Last Updated 27th October, 2010
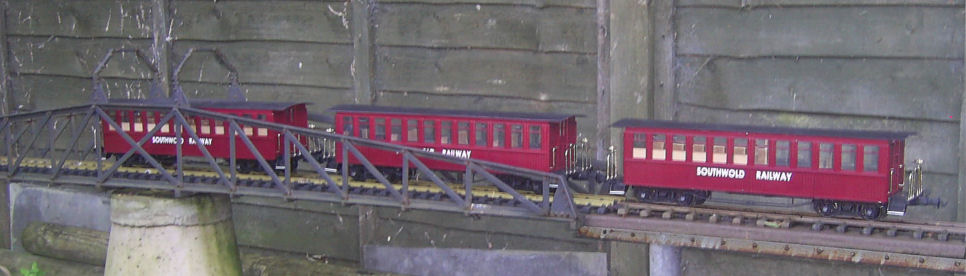
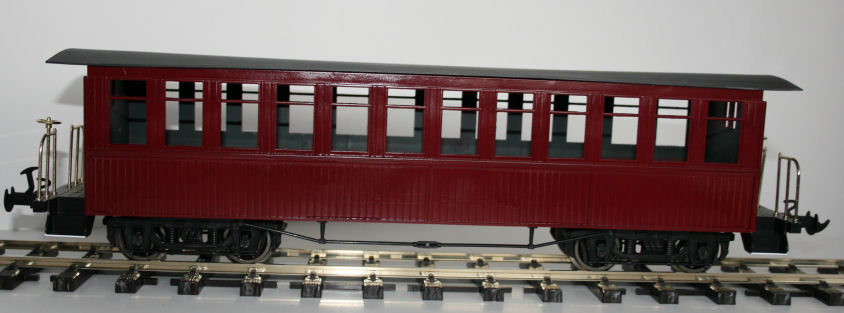
The Southwold Railway had a fleet of 6 basically similar 6 wheel coaches, with chassis built using the 6 wheel Clemison system. Originally built with open verandas the coaches had bench seating down each side with a passageway down the centre. The draughty veranda's were gradually enclosed during the 1920's with doors facing only one side of the coach as all stations had platforms on the same side and the line had no facility to turn the coaches.
Models of these coaches are going to need to be totally scratch built, whilst I do have the axleboxes, wheels and couplings to hand, finding the time to test the chassis construction and build the bodies is another matter.
The reinstatement discussion document published by the Southwold Railway Society in 2003 takes an updated look at the coaches and outlines the use of bogies rather than the cleminson system but retains the look and feel of the originals in both open veranda and rebuilt form. The reinstatement document suggests that a total of 14 coaches would be required by the revived line.
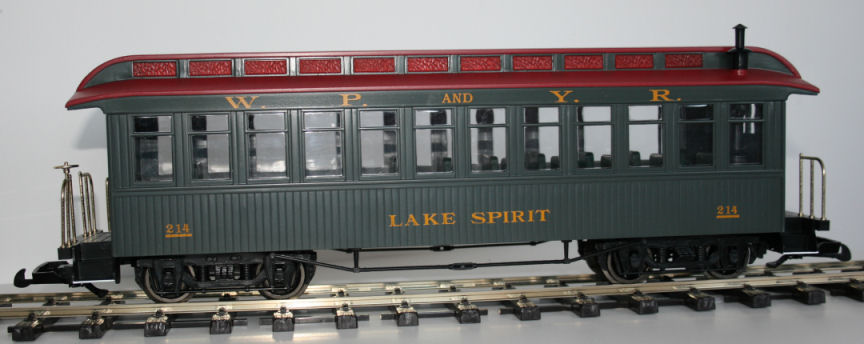
As a short cut (trying to get something to run in a relatively short time) I looked at a number of the coaches available in both 16mm and G scale and stumbled on the Jackson Sharp series produced by Bachmann.
These are available quite reasonably from eBay so three have been purchased pending conversion. First step is to sort the couplings. Originally fitted with LGB style units attached directly to the bogies, a single screw removes them, leaving the protruding shaft.
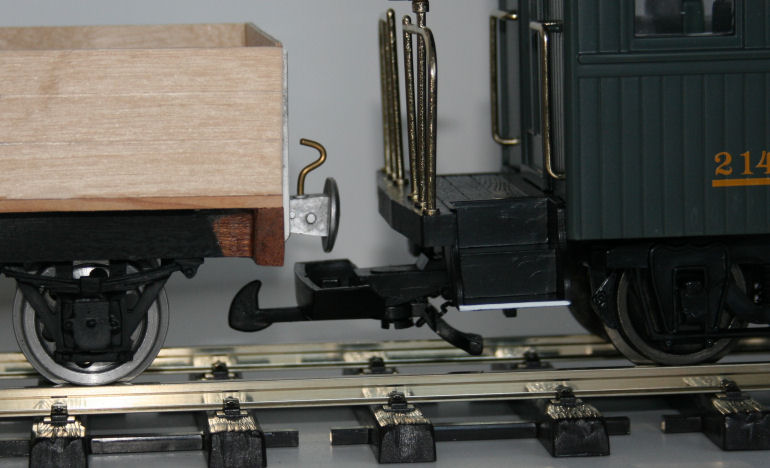
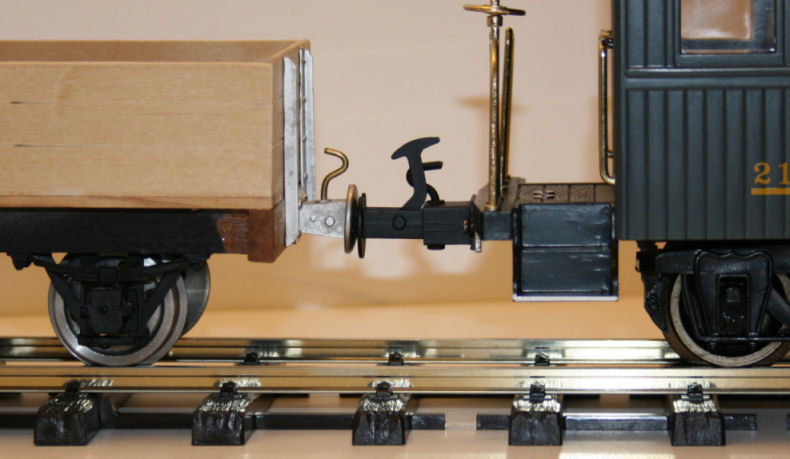
Setting up a piece of track I set the coach against an open wagon, this showed that the coupling height will need rising so it's about level with the carriage floor. Given the generous curves on my line this gives me the chance to attach the coupling to the coach body as in the prototype rather than direct to the bogie. Trying to leave the bogies as complete as possible should I want to revert to other couplings, I noted the coupling shafts will interfere with the revised coupling position so my first plan was to rotate the bogies 180 degrees, whilst this works, it affects the front and back rocking movement potential of the bogie so the shafts were removed.
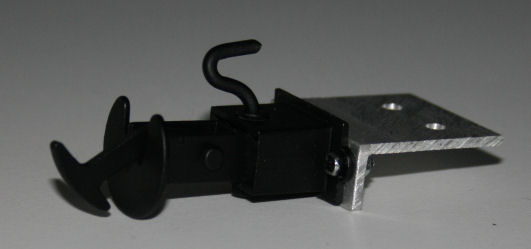
Hedging towards authenticity I decided to fit the keenly priced Accucraft chopper couplings to these coaches, these are bolted to a short length of aluminium angle which in turn is bolted under the coach floor once a slice of the leading edge of the coach floor is shaved off. The aluminium plates are secured to the floor by 2 countersunk bolts, the holes for which are strategically placed so the slot in the heads will line up with a grove between the moulded floor boards of the veranda.
Offering the coach up against the wagon now shows a good match in the coupling heights, just need a little paint on the mounting bracket and bolt heads to get them to blend in.
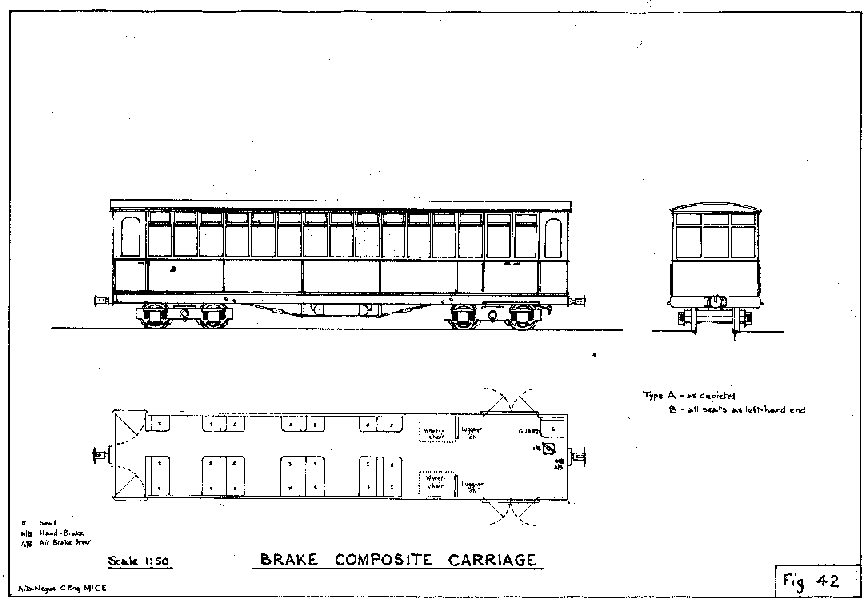
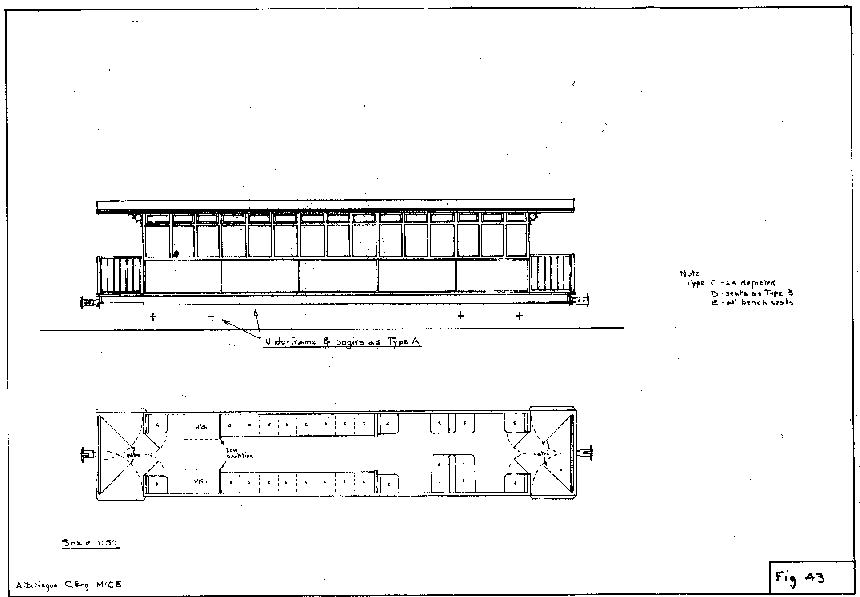
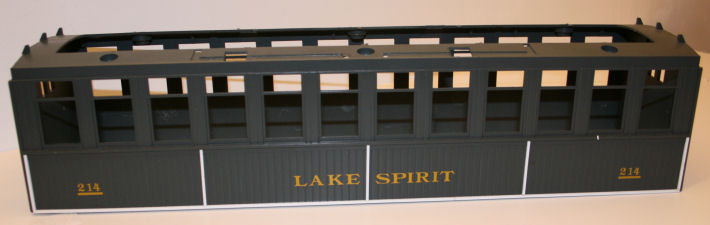
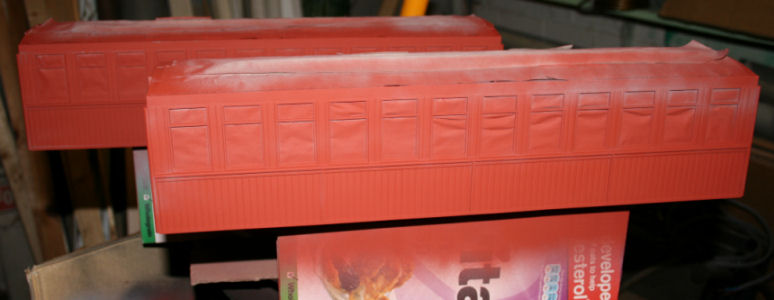
Although the Bachmann coaches are a little shorter than the reinstatement ones, they have a similar window layout. The pattern of moulding, repeating every three windows, can be duplicated but will give 4 rather than 5 blocks on my coaches. The mouldings are represented using 1.5mm square plasticard strip, attached using liquid poly.
The window openings were all masked from the inside to prevent the paint creeping inside, strips of masking tape were also stretched over the roof opening for the same reason. Using an empty cereal box I constructed a support for the coach body so that it did not need to be put down whilst the paint was wet. A couple of coats of Halfords grey primer were sprayed on and left to dry. I went to the shop to get some fresh Rover Damask Red this said it needed a red primer so a third primer coat was added, making sure I caught the bottom edge of the plastic strip framework along the bottom edge of the coach body. March is probably not the best time of the year for painting so between each coat the coaches rested on top of our central heating boiler for a little warmth.
After a little over 24 hours the first top coat was dusted over the primer. This was followed by another 4 coats to build up the colour. Once touch dry the coach bodies were removed from the cereal box supports and left on top of a radiator for a few days to thoroughly dry.
Unfortunately the original printed lettering can just be seen below the new paint, if I did this again I think Id try to remove the original paint before embarking on the conversion of the body not sure how Id go about this however!
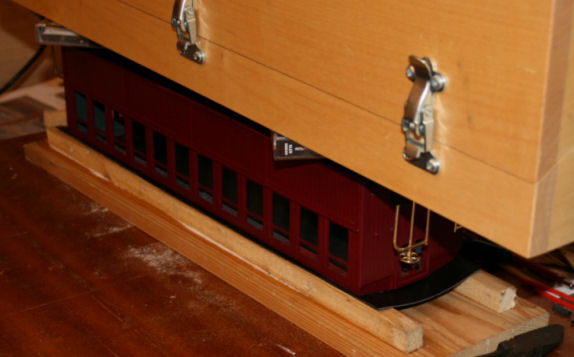
The Bachmann coaches have a clerestory roof (the raised bit in the middle with the coloured panes). These are easily removed by loosening the 6 screws visible from the inside. Fortunately the roofs on the plans have a simple curve. A large sheet of plasticard was cut in to strips just over 10cm wide, these were fastened to the body using epoxy glue - the slow setting version. The floor was temporarily fitted back to the coach body, minus bogies, to give the structure some rigidity whilst it sat upside down on a simple jig comprising two strips of wood on a flat base.
One of my loco's, in it's carrying box, was then placed on top, imparting the curve in the roof. The whole lot was left to set for a day.
Results were not quite what I'd hoped for, the ends of the roof have taken on a nice curve but the center section far less so! After consulting the 16mm Yahoo Group a slightly different approach was tried. The remaining two roofs were pre-bent by easing them round a piece of plastic pipe (this having a radius less than the coach to allow for some spring back) and securing them with cable ties whilst keeping a strip of wood along each edge to spread the pressure and produce the curve over the full length of the roof. After a dose of boiling water these were left for 24 hours to assume a uniform curve.
Once released from the pipe I found the process had worked a little too well, the inner roof forming a curve an almost perfect match for the coach body, but the outer one, that had taken the brunt of the boiling water, was curved a little too much! A little extra weight whilest waiting for the glue to set sorted that out!
Each of the three coaches has been built to represent a coach with a different seating plan (types C, D and E on the drawings) The reduced length has meant I've had to remove the wheelchair space on the type C coach. The seats are built on a sheet of 1/16 inch spruce which forms the floor. These were measured from the orignal Bachmann plastic seat moulding. The seat chairs are fabricated from 3/32 spruce and the backs from more 1/16. Supports for the seats are from some scrap pine, painted black to make them less intrusive, where possible these supports were placed over the point where the securing screws come up through the coach floor.
I made up a master sheet of lettering covering both the carriages and wagons, this was sent to DJB Engineering who produced a sheet of white decals.
The decals were sealed with a quick sparay of matt clear varnish.
Couplings
Sides
Roof
Seating
Lettering